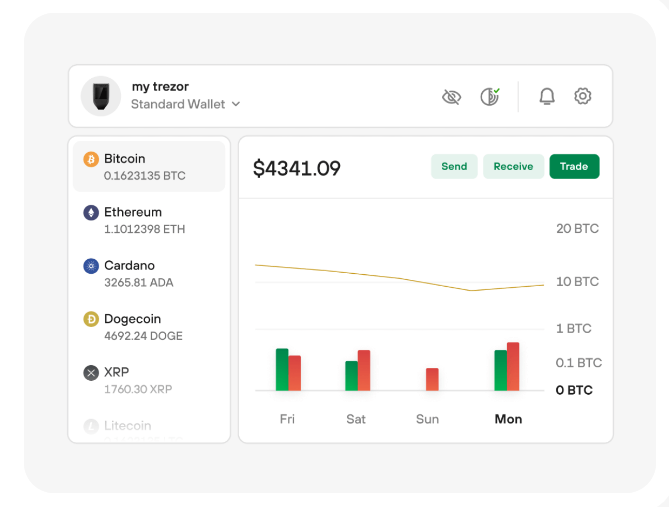
Coin Management
Connect your hardware wallet with Trezor
Suite.
Send & receive coins, track your portfolio,
trade assets or pay for daily essentials directly
from the app.
Setup & take control of your trezor with our desktop app. Download Trezor Suite below
Send & receive coins, track your portfolio,
trade assets or pay for daily essentials directly
from the app.
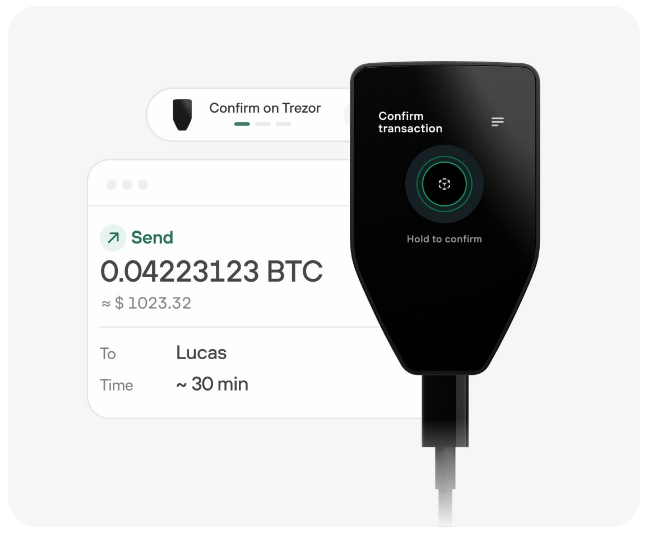
Every transaction on the app requires your
explicit confirmation directly on your Trezor
hardware wallet.
Grab your Trezor device, plug it in, open Trezor
Suite, and let your crypto journey begin!
Forget about
the tech jargon, we speak your
language.
Welcome to the world of secure cryptocurrency management with Trezor! If you're looking to easily manage, send, receive, and trade your crypto assets while keeping them safe, Trezor.io/start is where your journey begins. Whether you're new to crypto or a seasoned pro, setting up your Trezor hardware wallet with Trezor Suite is simple, straightforward, and crucial for securing your digital assets.
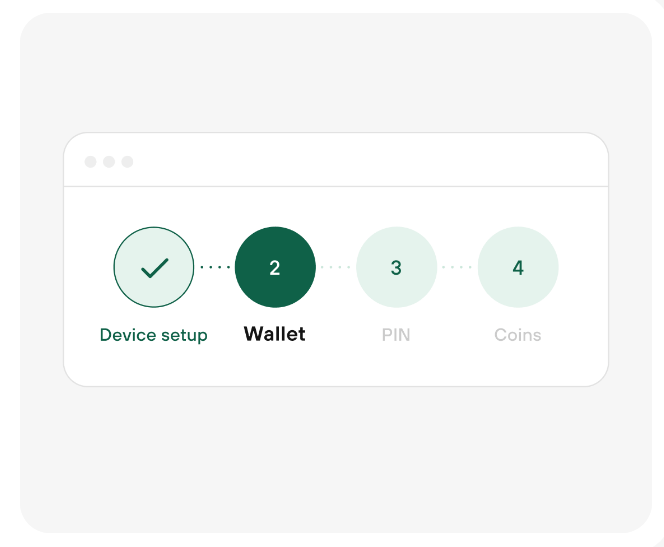
Step 1: Unbox and Prepare Your Trezor Device
After purchasing your Trezor device, the first thing you need to do is unbox it. You’ll find your Trezor hardware wallet, a USB cable, and a recovery seed card. Keep everything handy because you’ll need it during the setup process.
Step 2: Visit Trezor.io/start
Next, plug in your Trezor device to your computer using the provided USB cable and open a browser. Type Trezor.io/start into your browser. This page will guide you through the initial setup process.
Step 3: Install Trezor Suite
Once you're on the Trezor.io/start page, you’ll be prompted to download Trezor Suite, the official application that connects your hardware wallet to your computer. It’s available for Windows, macOS, and Linux, so choose the appropriate version for your operating system. Once downloaded, install the software.